When exporting data from Revit to Navisworks, sometimes parameter data may not appear. For example, Figure 1 shows a pipe create in Revit along with a sampling of some of the parameters associated with the pipe. Figure 2 shows the pipe in Navisworks (exported using the Revit Navisworks exporter).
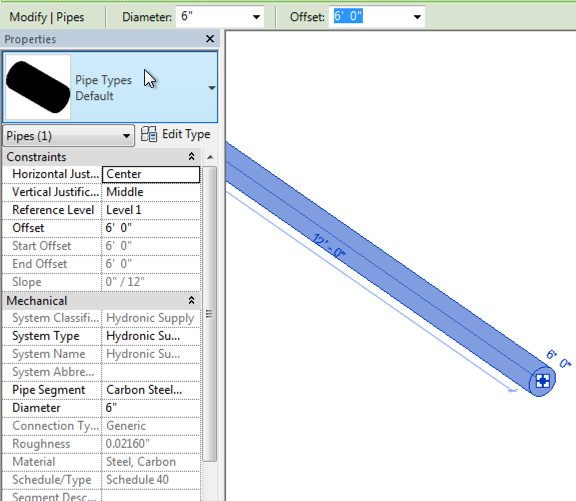 |
| Figure 1 - Revit Parameter View for Pipe |
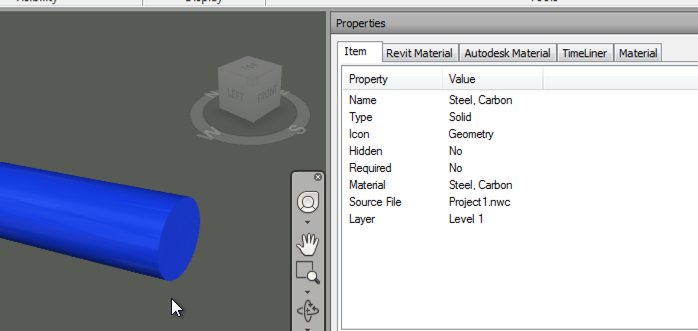 |
| Figure 2 - Navisworks Parameter View for the Selected Pipe |
The first reason that the parameters may not be coming across from Revit is with the export settings. Make sure that Convert element parameters and Convert element properties are both enabled. 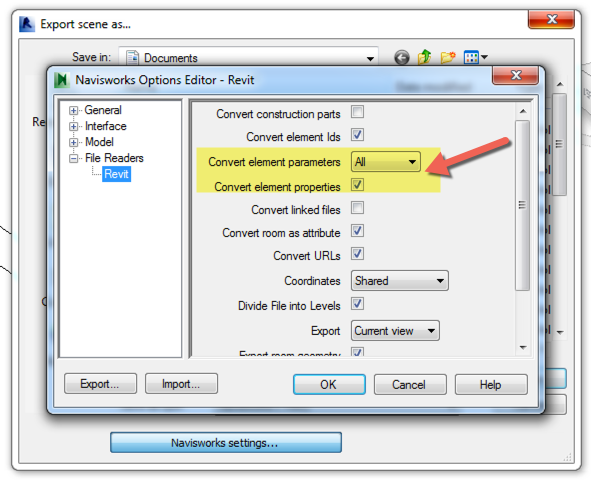 |
| Figure 3 - Revit Navisworks Exporter Settings Dialog |
|
The second potential reason for parameters not coming across or displaying is due to the
selection resolution (Figure 4) in Navisworks. When you select an item(s) in Navisworks, it doesn’t know what level/area of item to start selecting in the project browser. It could be at the model, layer, instance, group, or geometry levels. Navisworks provides six different resolution settings (From the Navisworks Help):
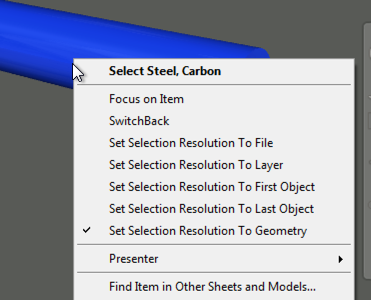 |
| Figure 4 - Navisworks Selection Resolution Options |
- File. Makes the object path start at the file level; as a result, all objects at the current file level are selected.
- Layer. Makes the object path start at the layer node; as a result all objects within a layer are selected.
- First Object. Makes the object path start at the highest level of objects below the layer node, if applicable.
- Last Object. Makes the object path start at the lowest level of objects in the Selection Tree. Autodesk Navisworks looks for composite objects first, and if none are found, the geometry level is used instead. This is the default option.
- Last Unique. Makes the object path start at the first unique level of objects (not multiple-instanced) in the Selection Tree.
- Geometry. Makes the object path start from the geometry level in the Selection Tree.
-
For example, Figure 5 shows a single element selected with the Selection Resolution set to Geometry. Note that in the project browser, the geometry level is highlighted and we have limited parameter data available in the properties palette. Figure 6 shows the same pipe selected as in Figure 5, but with the Selection Resolution set to First Object. Note that in the project browser, the selection starts at the highest level for the object selected (the pipe) and in the properties palette we have much more data about the object.
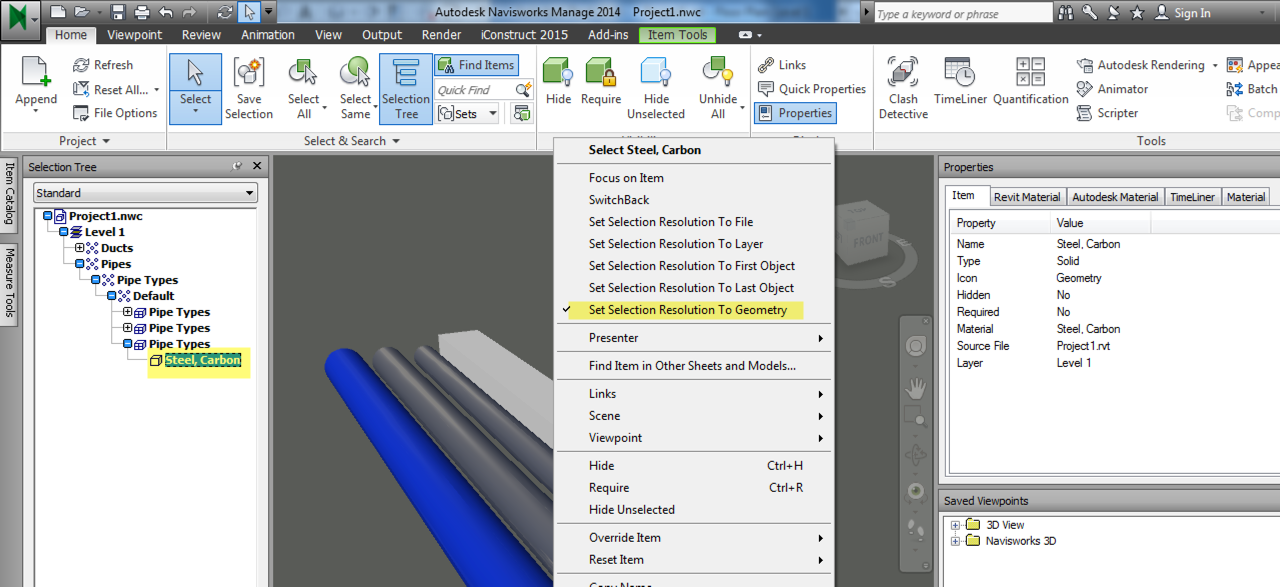 |
| Figure 5 - Geometry Resolution Setting & Properties Shown |
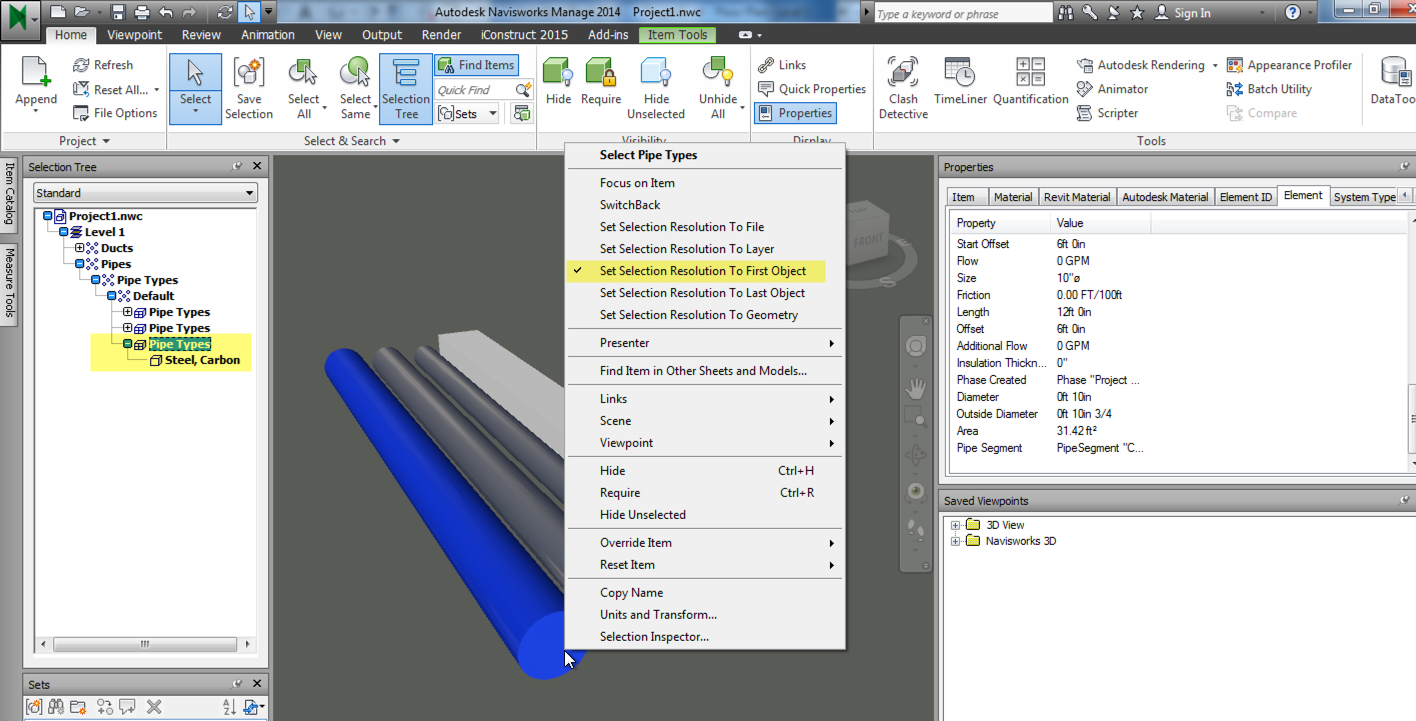 |
| Figure 6 - First Object Resolution Setting & Properties Shown |


Comments
Post a Comment