Autodesk Revit Model Review is a very powerful tool for checking the contents of your model. A friend asked me how he could use Revit Model Review to check the naming of Sheets in project files. This is fairly easy.
The first step is to define a new check in Model Review. For this particular check, we are going to check the
Parameter Requirements which is part of the
Standards checks (Figure 1).
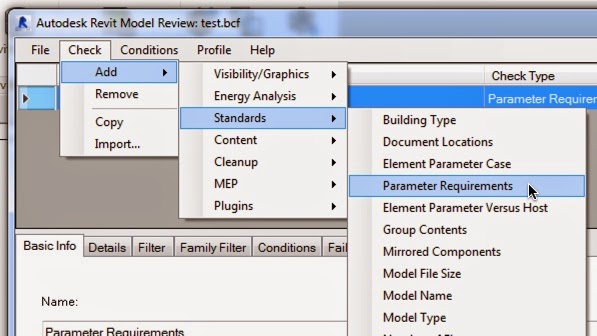 |
| Figure 1 - Creating New Check |
The next step is to define the "details" of the check. For this rule, we are going to check the Revit parameter sheet name to make sure that the aheet name starts with "ARC-". The easiest method to begin to define the details is to click on the
Pick Element And Choose Parameter button. This will allow you to select a model element. For this example, we will select the titleblock.
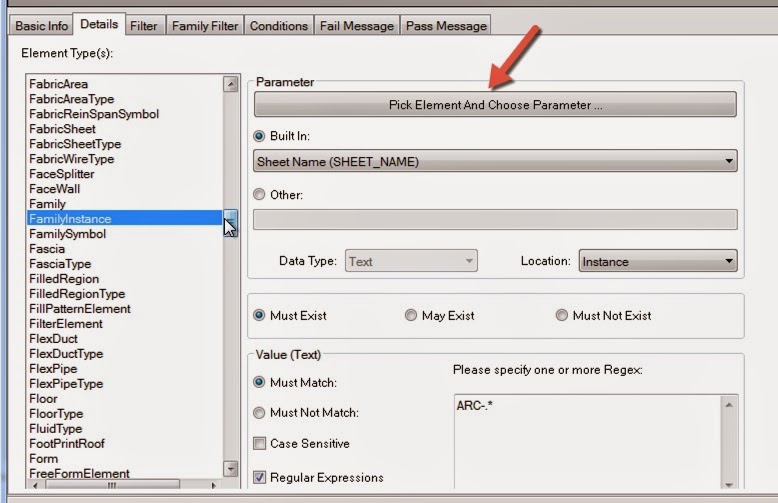 |
| Figure 2 - |
When you select the titleblock, the Element Property List dialog (Figure 3) will open. Scroll thru the list to find the parameter that you want to check. In this example, we are checking the Sheet_Name parameter. Select the parameter and then click the
Select button to close the dialog.
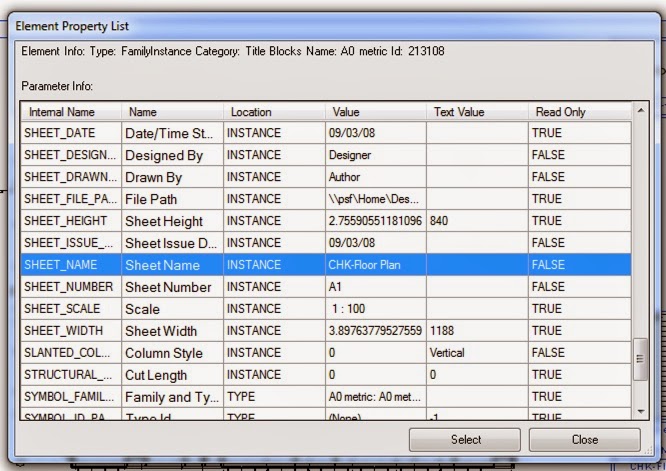 |
| Figure 3 - Element Property List Dialog |
Using the Pick Element allowed automatically selected the specific Element Type(s) and the specific parameter. For this example, we want to check the Sheets in the project to determine if they start with the prefix "ARC-". To do that we need to check the parameter text value. Figure 4 contains the values that must be set:
Must Exist Must Match Regular Expression Under "Please specify one of more Regex:" we need to add the expression
ARC-.*. "ARC-" is the text that we want to check. The ".*" is a starts with / ends with expression. This is a common task/check that you will use in Model Review.
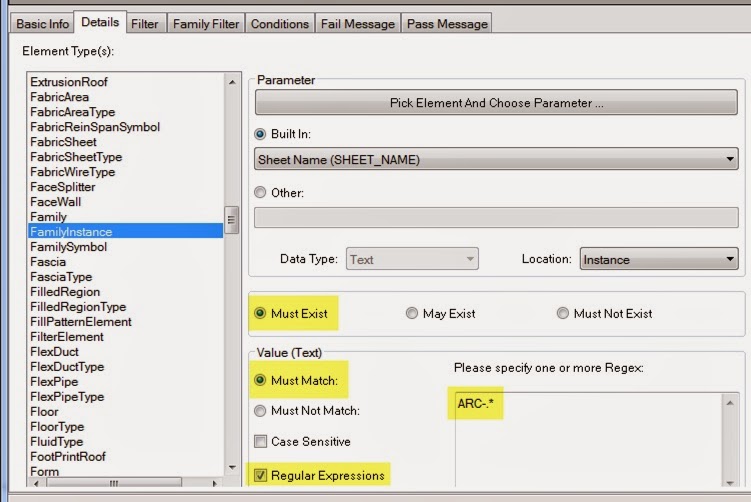 |
| Figure 4 - Expression Setup |
The last item that we need to setup for this task is filtering which model elements Model Review will check. Since we are checking the titleblock sheet name parameter, we should limit the search to just just titleblocks allowing the check to run faster.
Click on the Filter tab. In the dropdown under filter control, select
Catergory. In the category selection, click on
Title Blocks and then click the
Add button to all the filter.
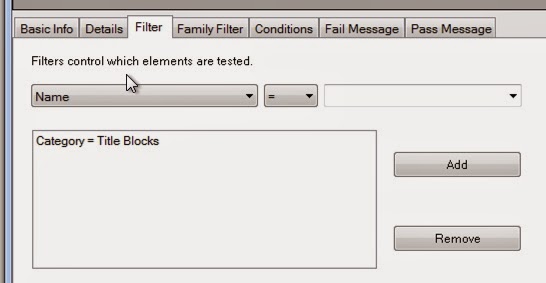 |
| Figure 5 - Filter |
The last step is to save the check and run it against the project. Note that one of the the sheets contains the prefix and one does not and the Model Review check is reporting correctly.
 |
| Figure 6 -Check Results |
Download check file with this
link.


Comments
Post a Comment